

Configuring VS Code
Getting Started with Knapsack MCP + VS Code
Before we can begin configuration you’ll need to install and setup VS Code (version 1.101 or later). Download the latest version of VS Code from Microsoft:
https://code.visualstudio.com/download
If your organization maintains an allowlist or registry of approved MCP servers, be sure to add your Knapsack MCP site’s workspace ID to this URL: https://mcp.knapsack.cloud/mcp/<workspace-id>
To find your workspace ID, find the URL of your Knapsack site and look for what comes between site / and / latest.
Below is an example of how we at Knapsack would find our workspace ID:
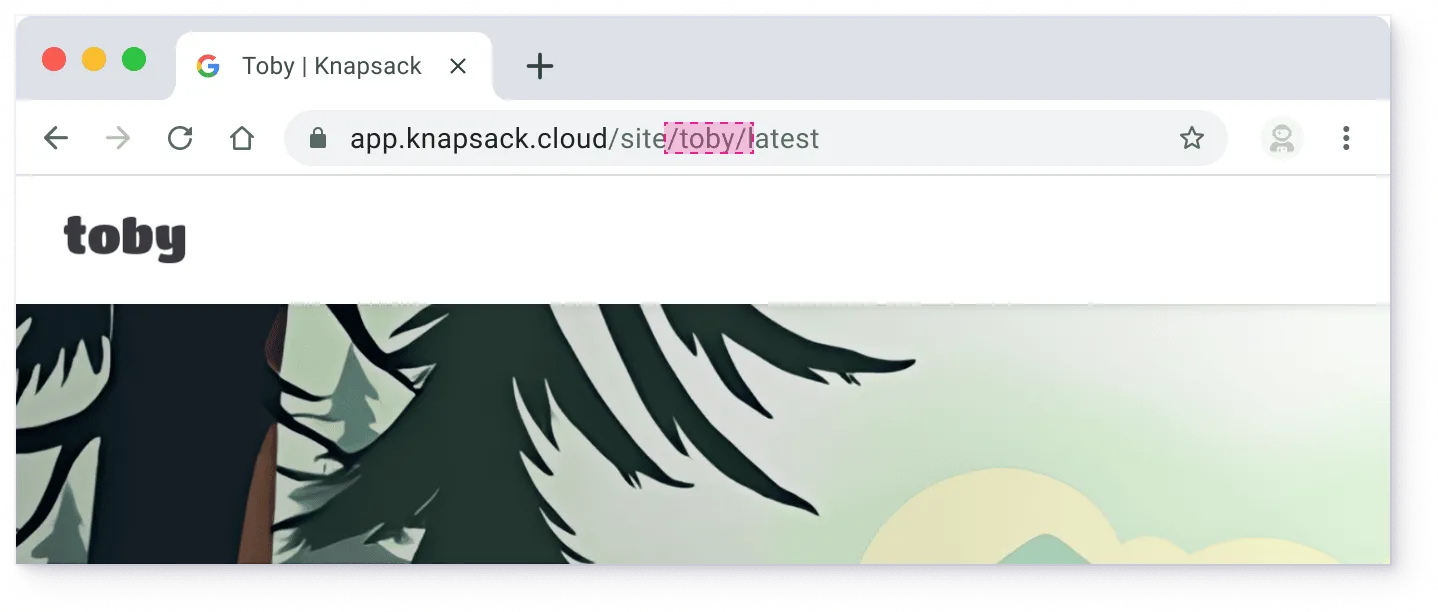
Our MCP URL would be https://mcp.knapsack.cloud/mcp/toby
Prerequisites
- Knapsack MCP requires a local
Node.js v20or later to run successfully. - Note: There are many third-party and system-level methods and tools for managing node versions.
- You can check and manage your Node version using nvm (Node Version Manager), as shown in the example below.
Setup Instructions
After installing VS Code in the Getting Started section, we can move onto our configuration.
Step 1) Obtain MCP Server URL
Construct your MCP server URL using the format below. Replace {workspaceID} with your Knapsack workspace ID.
https://mcp.knapsack.cloud/mcp/{workspaceID}
Example:
https://mcp.knapsack.cloud/mcp/toby
Step 2) Open the Command Palette in VS Code
- Open the command palette
- Mac:
Cmd + Shift + P - Windows/Linux:
Ctrl + Shift + P
- Mac:
- Type
mcpand select Add Server from the dropdown.
Step 4) Enter MCP Server URL
Paste your Knapsack MCP server URL from Step 1 and assign a name to it (e.g., knapsack-toby) for easy identification.
Step 5) Choose Installation Scope
Select whether you want to install the MCP configuration globally or for the current workspace only.
Step 6) Authenticate Your Account
After saving, VS Code will prompt you to authenticate. Click “Allow” to proceed.
- If you’ve previously authenticated, select your existing account.
- Otherwise, log in with your organization’s authentication method (e.g., SAML, Microsoft 365).
Trouble authenticating? Restart VS Code and try again. You can use the command palette to list MCP servers and start the server you created in the steps above.
Step 7) Verify MCP Server Setup
After authentication, confirm the new server is available.
You should see the tool listed in Copilot (e.g., knapsack-{workspace-id}-mcpserver).
Step 8) Use Copilot with MCP Server
Once connected, Copilot can use your Knapsack MCP server as a context source.
For example, you can ask:
“List all available design tokens from my Knapsack workspace.”
When you use an MCP tool for the first time, Copilot will ask for permission. Choose whether to allow it for:
- The current session
- The current workspace
- Or always
Troubleshooting
If something isn’t working, try these steps:
- Check the logs: Errors usually reference the log file location. Review the logs for details.
- Early Access not enabled: Ensure your workspace has MCP access enabled; otherwise, the connection will fail.
- Old Node version:
MCP requires Node 20. Use
nvmto uninstall older versions and set Node 20 as both your current and default. - Trouble authenticating: Restart VS Code and try again. You can use the command palette to list MCP servers and start the server you created in the setup instructions.