

Custom Fonts
Overview
The “Custom Fonts” dashboard allows you to add, manage, and apply custom fonts throughout your Knapsack workspace. By configuring custom fonts, you can ensure that your design system reflects your brand’s unique typography, enhancing the overall look and feel of your user interface. This guide walks you through accessing the Custom Font settings, adding new fonts, managing existing ones, and applying them across various UI elements in your workspace.
Accessing Custom Font Settings
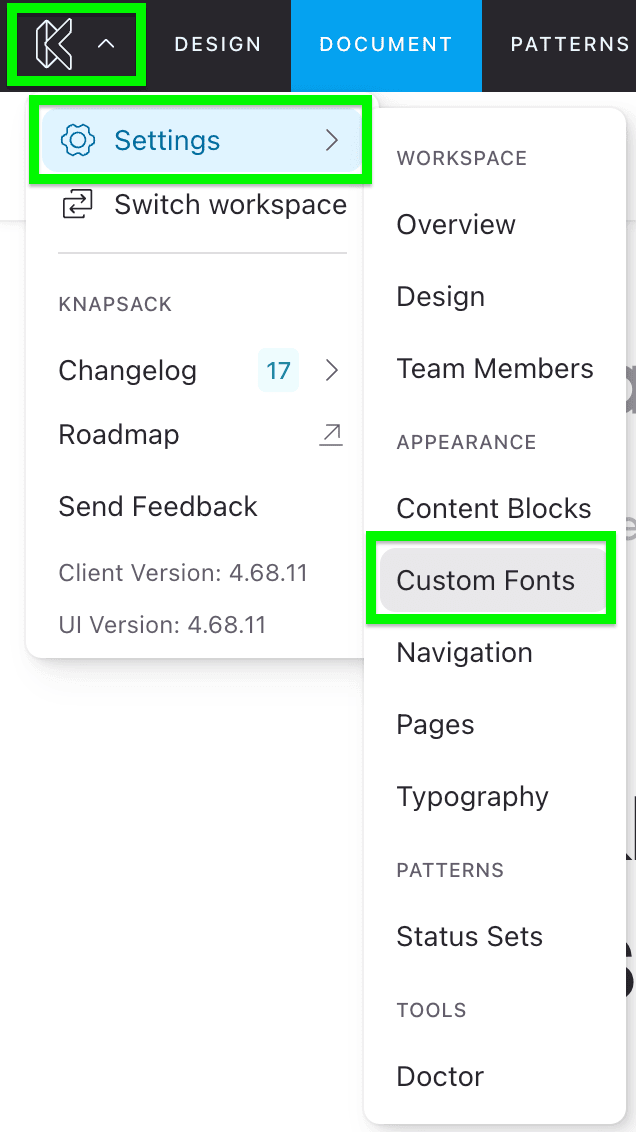
To access Custom Font settings, go to the app menu in the top left corner of the screen, select Settings, and navigate to Custom Fonts.
Adding a Custom Font
To add a Custom Font:
- First click the blue outlined “Add a Font” button.
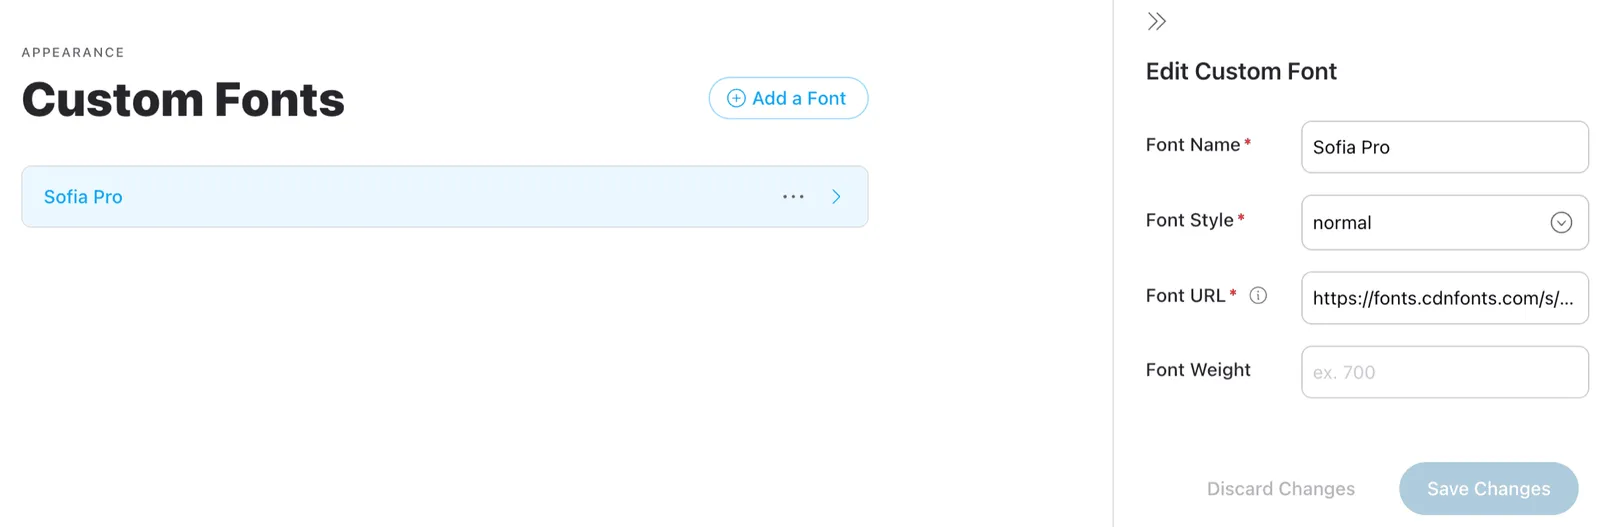
- You’ll need to provide:
- font name
- font style
- font URL (linking to the woff or woff2 font file)
- and an optional weight for the custom font.
- After configuring the font, click the blue “Save Changes” button.
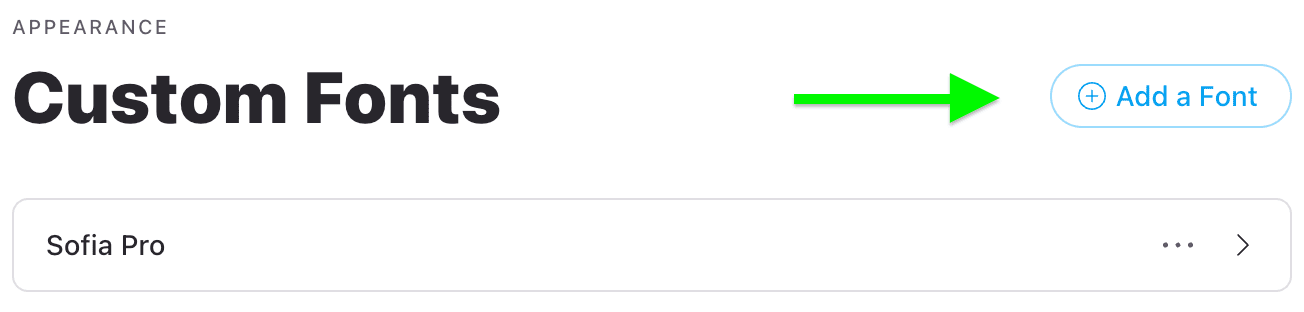
The new custom font will then be available for use across Knapsack wherever font styling is applied, such as in headings, body text, and links.
Managing Custom Fonts
To manage existing Custom Fonts, click on the font you want to edit. This will open the right fly-out menu, where you can modify the font’s configuration as needed.
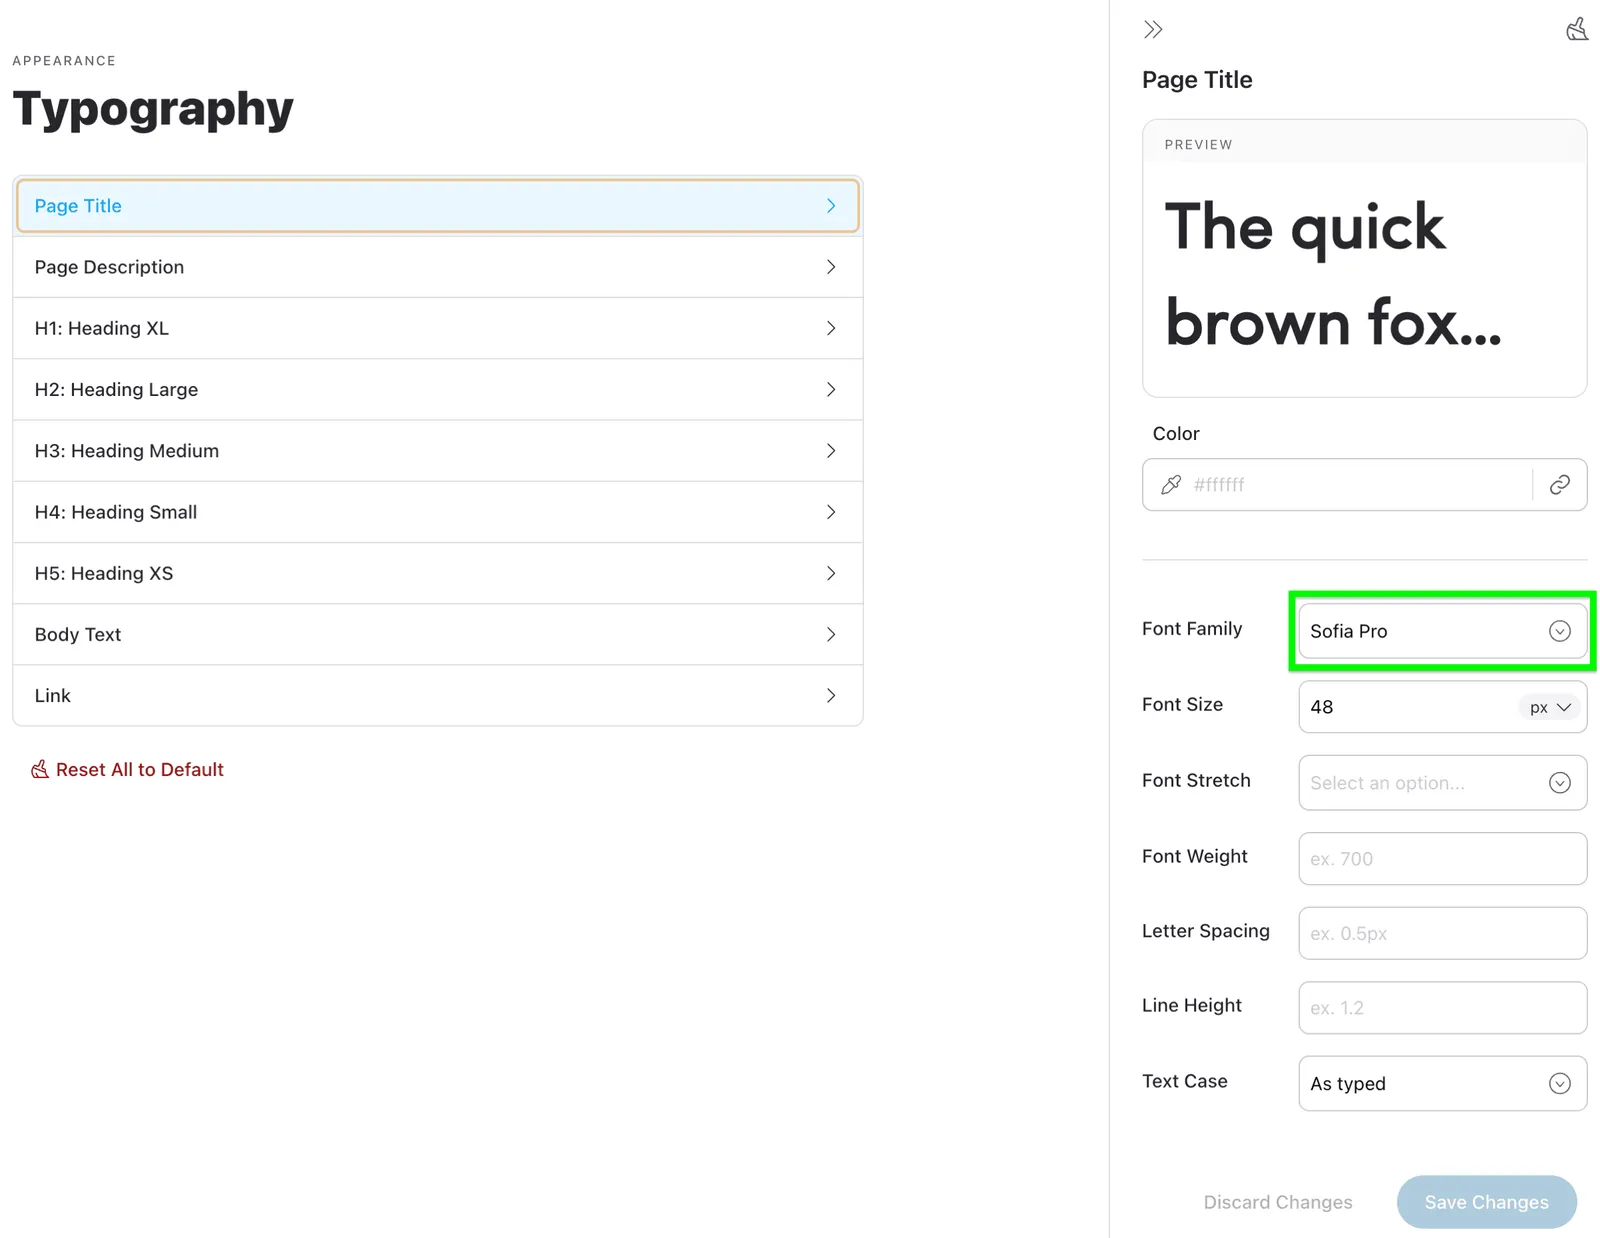
Example: Apply Custom Fonts
In this example, we demonstrate how to use the newly added custom font within the Typography settings for the Page Title.
By leveraging custom fonts, you can maintain brand consistency and elevate the visual appeal of your design system, ensuring that all text elements align with your organization’s identity.