

Bitbucket
Overview
Bitbucket integrates seamlessly with Knapsack, enabling efficient management of your design system and component library. Bitbucket’s cloud-based platform provides robust features, including pull requests, inline commenting, and CI/CD integration, making it an excellent choice for development teams of all sizes.
Cloud Authoring
Authentication through Access Token
To enable cloud authoring within Bitbucket Cloud we use an Access Token for authentication. This token allows secure access to your Bitbucket repository and enables necessary actions on your behalf.
Permissions Required
You may need elevated privileges on your repository to generate a new Access Token. If you encounter any issues, please reach out to our support team for assistance.
Step 1: Generate an Access Token
- Log into Bitbucket and navigate to the repository containing Knapsack.
- In the left sidebar click “Repository settings”.
- Next, click “Access tokens” under “Security” (Security » Access tokens)
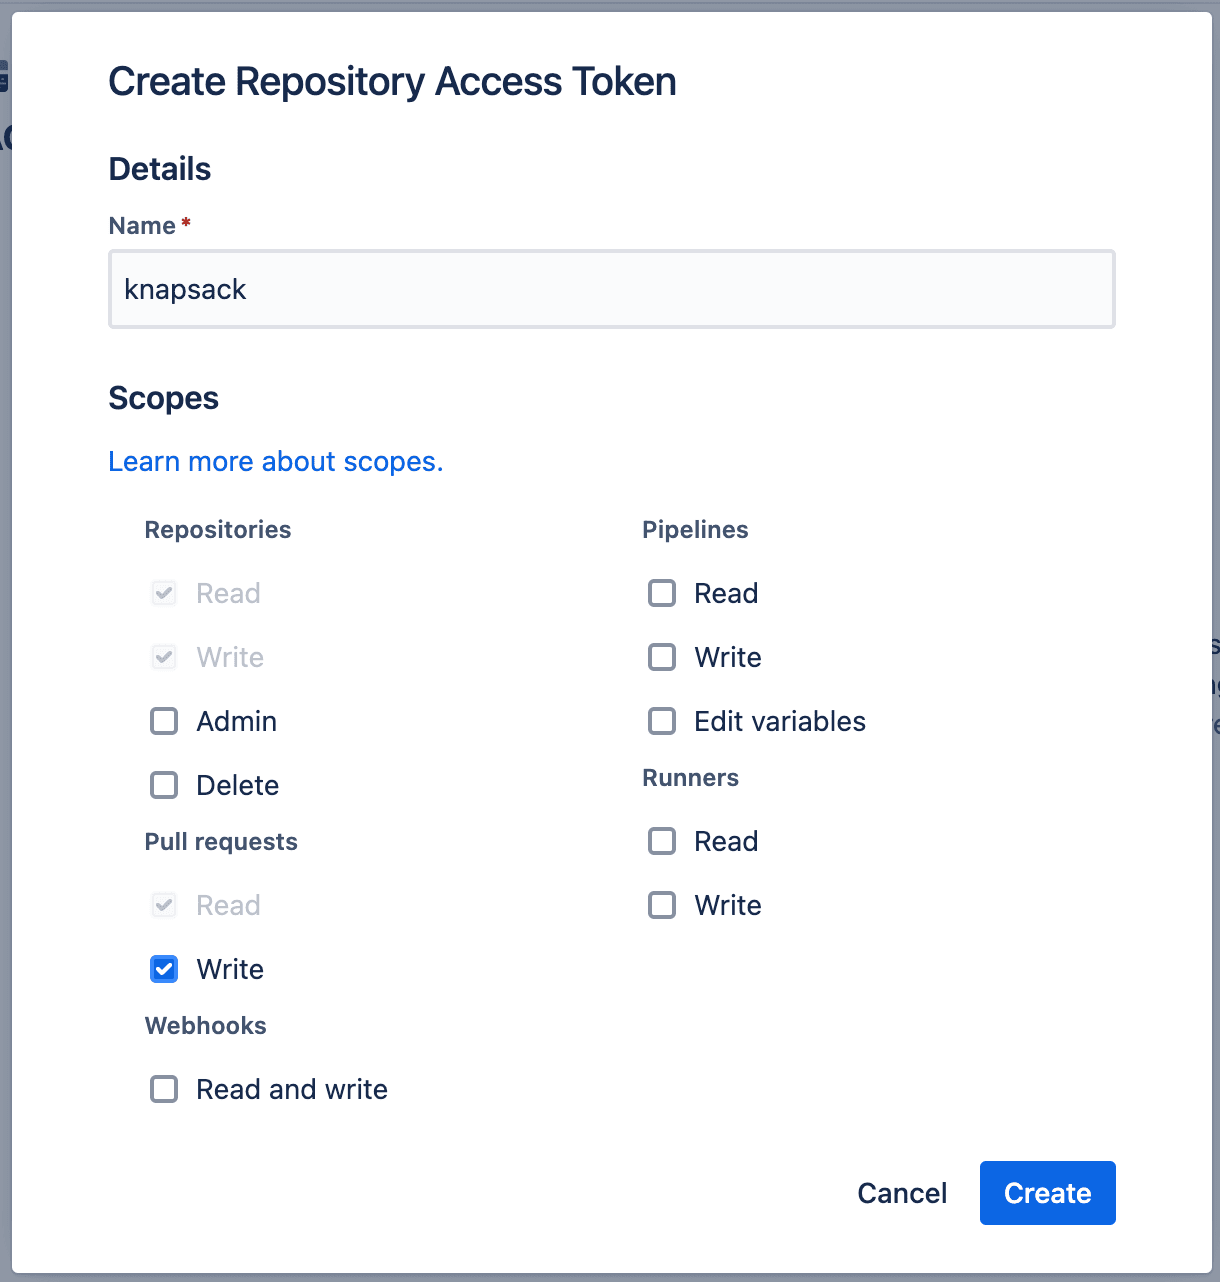
- Name your token (i.e. Knapsack) and provide these scopes/permissions:
- Repository — Read and Write
- Pull requests — Read and Write
- Click “Create”
A repository access token grants access to this one repository only. You can revoke it at any time from the same Access tokens page; cloud authoring for the repository stops working until a new token is delivered.
Step 2: Deliver Securely
- Setup a meeting with your Knapsack representative.
- Deliver securely the Access Token.
Step 3: Knapsack completes integration
-
Knapsack adds the Access Token to our secure database.
-
We run tests to verify the integrity of cloud authoring capabilities.
-
We notify you when its all done. 🎉
Bitbucket Pipelines
Required Deployment Variables
Deployments to Heroku rely on the following deployment variables:
HEROKU_EMAIL— The email associated with the Heroku account.HEROKU_API_KEY— The API Key associated with the Heroku account (found in profile settings)HEROKU_GIT_URL— Located on the app dashboard within Heroku’s admin interface
In this example
- For any pull request, the pipeline installs dependencies and builds the application.
- For the
mainbranch, the pipeline performs two steps:- Install Deps and Build: Installs dependencies and builds the application.
- Deploy to Heroku: Deploys the built application to Heroku using authentication details provided through environment variables.