

Azure Dev Ops
Azure DevOps combines Git repository management with a suite of development tools, including CI/CD pipelines, project management, and more.
Overview
By integrating Knapsack with Azure DevOps, you can streamline your design and development workflows, automate testing and deployment processes, and maintain a high level of code quality. Azure DevOps’ seamless integration with other Azure services also provides a cohesive environment for managing your entire development lifecycle.
Cloud Authoring
Authentication through Personal Access Token (PAT)
To enable cloud authoring within Azure, we use a Personal Access Token (PAT) for authentication. This token allows secure access to your Azure repositories and enables necessary actions on your behalf.
Step 1: Add Knapsack Bot
Add our Knapsack Bot (knapsack-bot@knapsack.cloud) to your repository as a collaborator with the necessary permissions.
Permissions Required
You may need administrative privileges on your repository to invite the Knapsack Bot as a collaborator. If you encounter any issues, please reach out to our support team for assistance.
Step 2: Token Generation
With Knapsack Bot added, we will take care of generating the token for you.
Important Notes
This is a manual process. If handling asynchronously, we’ll notify you when it is completed.
Mandatory Step
This step must be completed for Cloud Authoring to function.
Alternative Configuration
Generate and Securely Deliver a Token
Follow the below steps if your organization would prefer to completely own the PAT:
- Your organization handles generating a PAT.
- Securely deliver the token to us. We can arrange a live session to ensure secure delivery and setup.
Web Hooks
Integrating Repository Events with the Knapsack API
To synchronize repository-related events with the Knapsack UI, it’s crucial to set up web hooks. Specifically, we’ll configure two web hook triggers:
- “Pull request merge attempted”
- “Pull request updated”
This setup will automatically update the Knapsack UI when pull requests (PRs) are closed in Azure, such as removing a branch from the active branch list.
Steps to add the first web hook:
- Follow the guidelines in this article to get started.
- Navigate to “Service Hooks” under “Project Settings” (found in the bottom left corner).
- Click the “Add New” icon, then select “Web Hook”. Proceed by clicking “Next.”
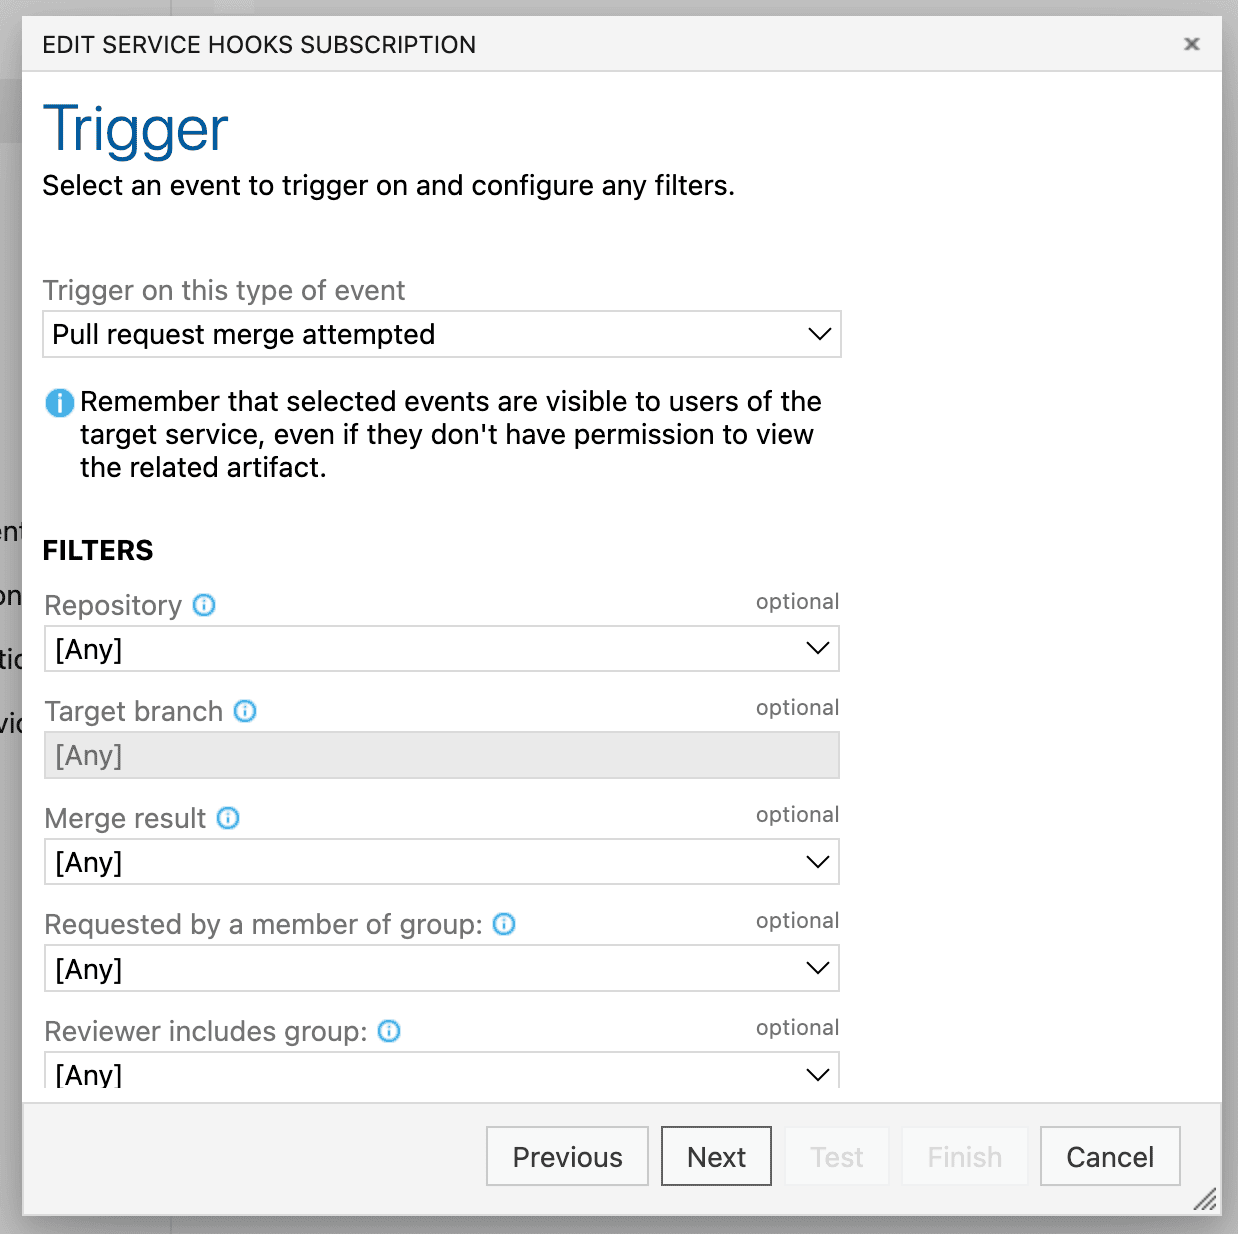
- For the trigger, choose “Pull request merge attempted”.
- Ensure the appropriate repository is selected. Leave all other options set to “[Any]”.
- Click “Next.”
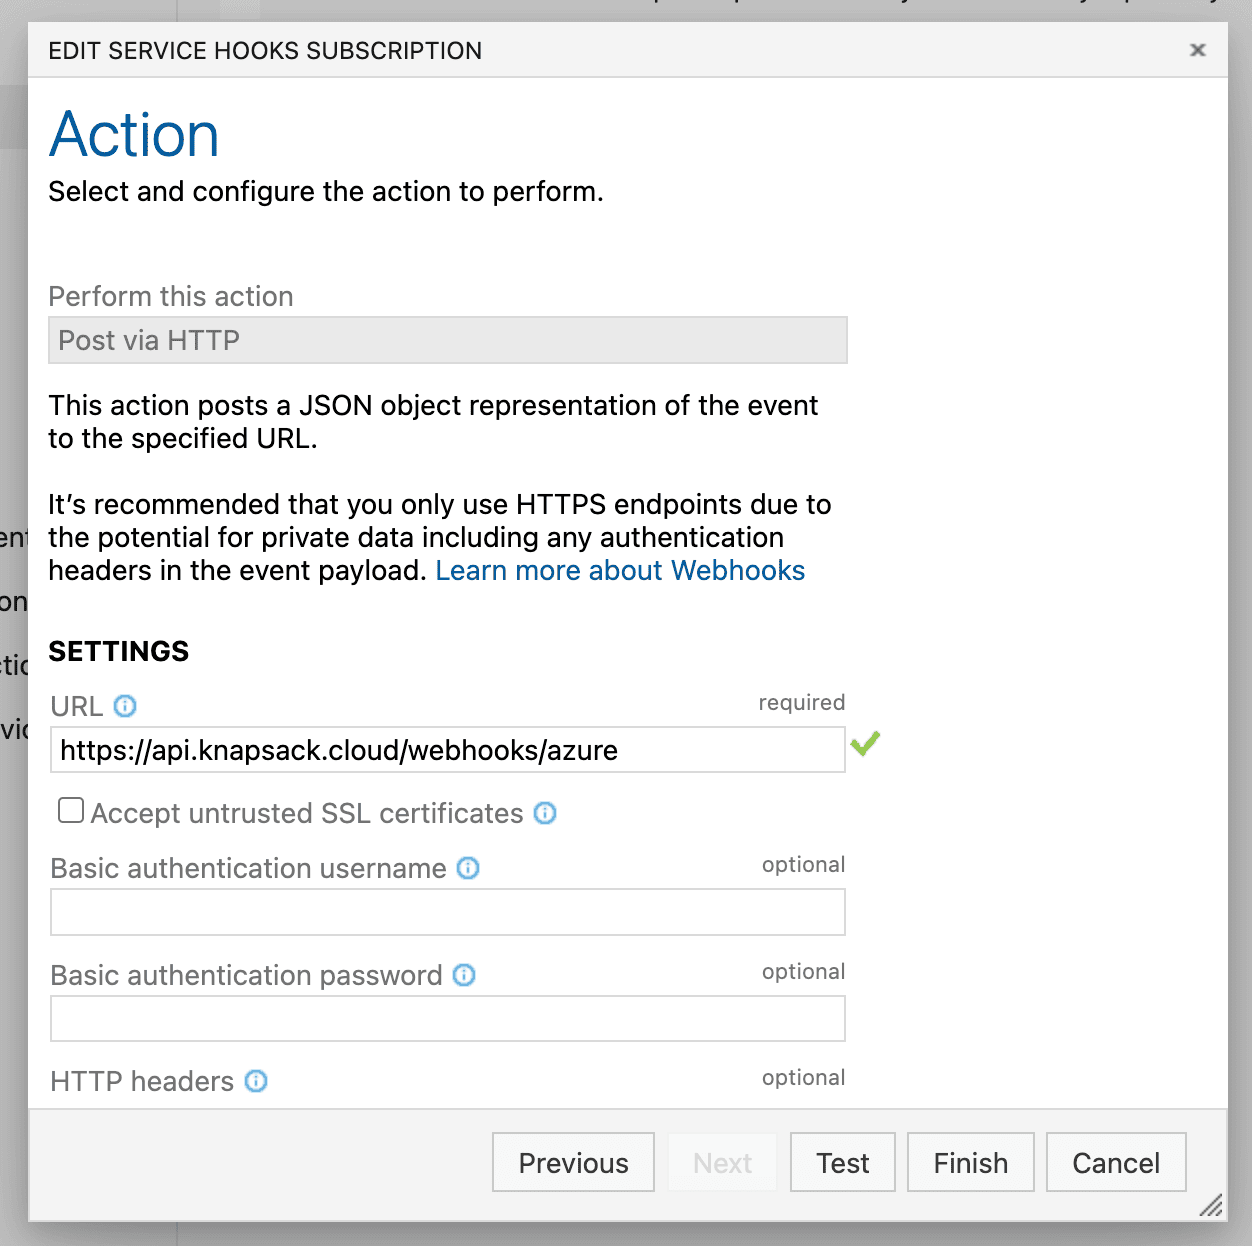
- In the settings section, input the following URL: https://api.knapsack.cloud/webhooks/azure.
- Conclude by clicking “Finish”.
Steps to add the second web hook:
- Repeat steps above with trigger set to “Pull request updated”
- All other settings should match the previous above steps
Azure Pipelines
Required Secret Variables
Deployments to Heroku rely on the following secret variables:
HEROKU_EMAIL— The email associated with the Heroku account.HEROKU_API_KEY— The API Key associated with the Heroku account (found in profile settings)HEROKU_GIT_URL— Located on the app dashboard within Heroku’s admin interface
Summary
- The pipeline is triggered by changes to the
mainbranch. - It uses an Ubuntu VM image and defines a variable group for Heroku credentials.
- It installs Node.js, checks out the source code, and fetches the complete Git history.
- It installs dependencies, builds the application, runs tests, and writes Heroku authentication credentials.
- Finally, it pushes the
mainbranch to Heroku for deployment.
This setup ensures that changes to the main branch are automatically built, tested, and deployed to Heroku.